%201.svg)
Mailbox Addition
Connect your primary mail-box to view your sales email.
- Purpose: This is a step by step explanation on how to connect your primary mailbox to view all your sales mail in Thriwin.
Step-by-Step Instructions
Navigating to mails
- You can navigate to the mails page by clicking on Sales CRM then mails.


Selecting email provider
- Description: Select the provider of your email and login to give Thriwin access to your emails so that they can be logged and viewed in the system.

- Eg:- For instance if your email provider is outlook click on the outlook option as shown above.
Viewing connected mail
- Description: After completing the login process your mailbox will be added and any new mail from your leads or users will show up from now onwards.

- As seen in the above screenshot you can click the icon and view which email was connected. The connected email is displayed as in the screenshot below.

Alternative option of connecting “Others”
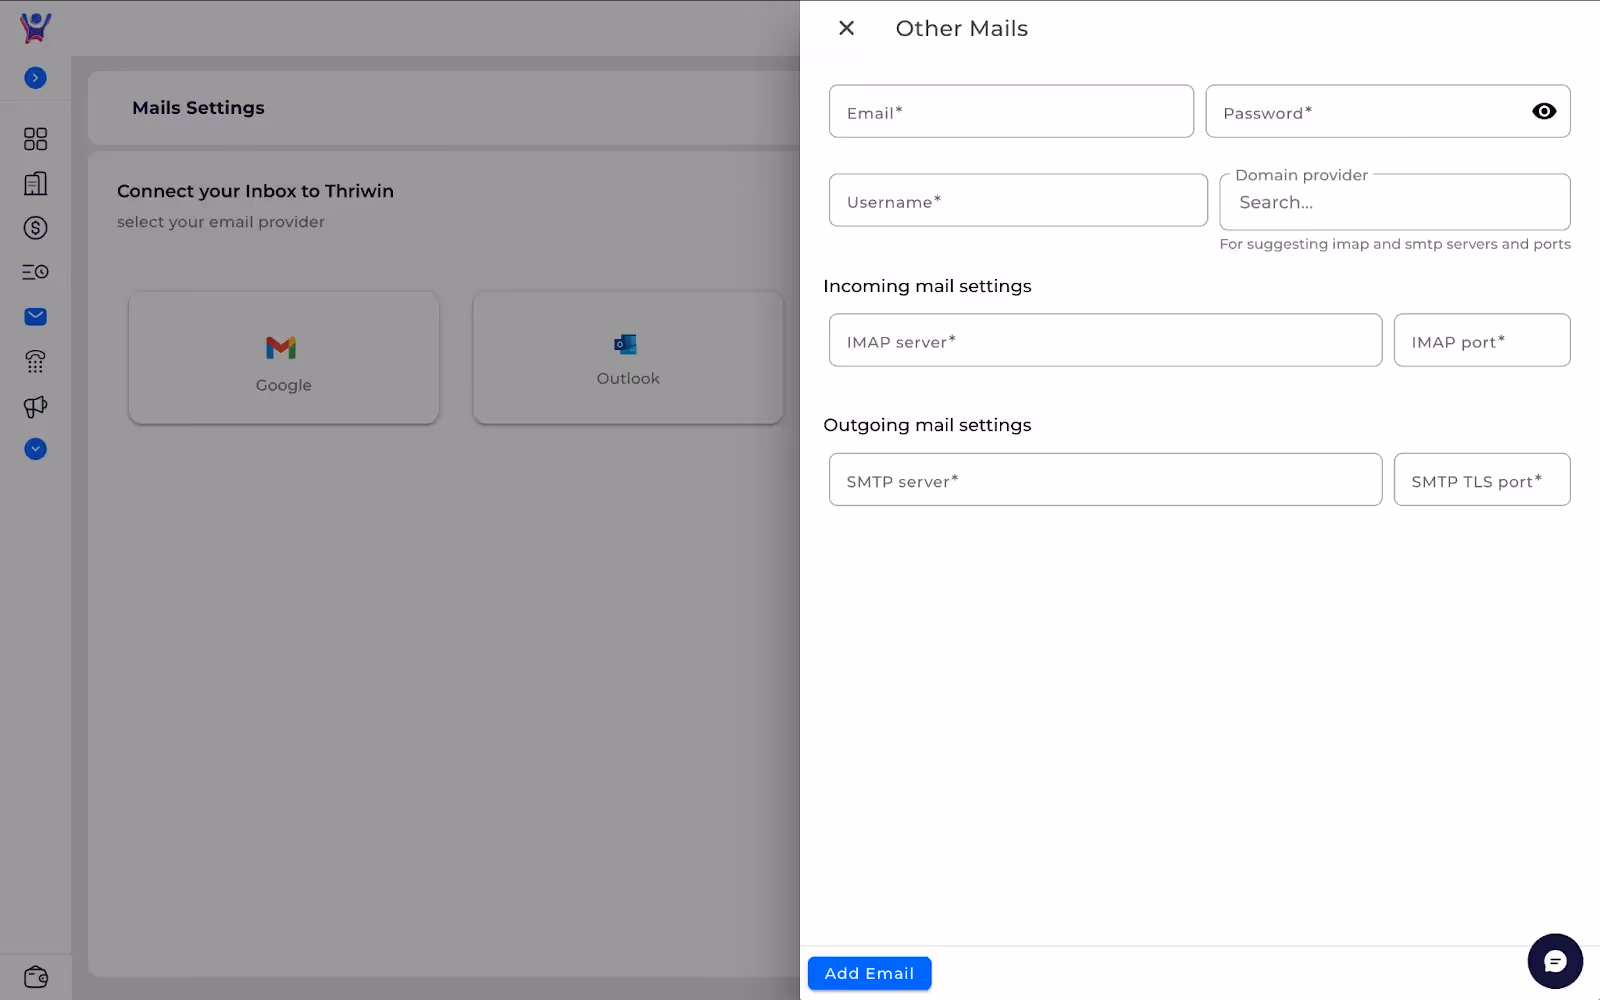
- Description: Alternatively if you want to connect any email not from the available providers you can click on the “Others” option as shown below.

- Description: It should open up a form as shown below.
- Image(1):
- Image(2):

- Description: The form fields in the above forms are respectively:-some text
- Email - The email which you wish to connect
- Password - The IMAP password generated for the above email.
- Username - The user’s name.
- Domain Provider(optional) - In Image(2) you can choose any of the popular Other domain providers if applicable to you, it will automatically fill the remaining fields for you.
- IMAP Server - The IMAP server details for your email provider.(eg: - for Yahoo it is imap.mail.yahoo.com)
- IMAP port - Port number for your IMAP server. (Most commonly 993)
- SMTP Server - The SMTP server details for your email provider.(eg: - for Yahoo it is smtp.mail.yahoo.com)
- SMTP TLS port - TLS port number for your SMTP server.(Most commonly 587)
FAQs
- Question 1: How can I disconnect my email?
- Answer: Click on Profile Icon > Disconnect as shown in screenshot below.
- Answer: Click on Profile Icon > Disconnect as shown in screenshot below.

Need More Help?
- Contact Support: For further queries, reach out to our Support Team.


.svg)


.svg)