Creating Sequences
How to create sequences for marketing campaigns
Introduction
- Purpose: This guide will walk you through creating a new sequence in Thriwin. You'll learn how to prepare marketing lists, templates, and email senders before configuring the sequence using the Sequence Creator tool.
Step 1: Prepare Prerequisites
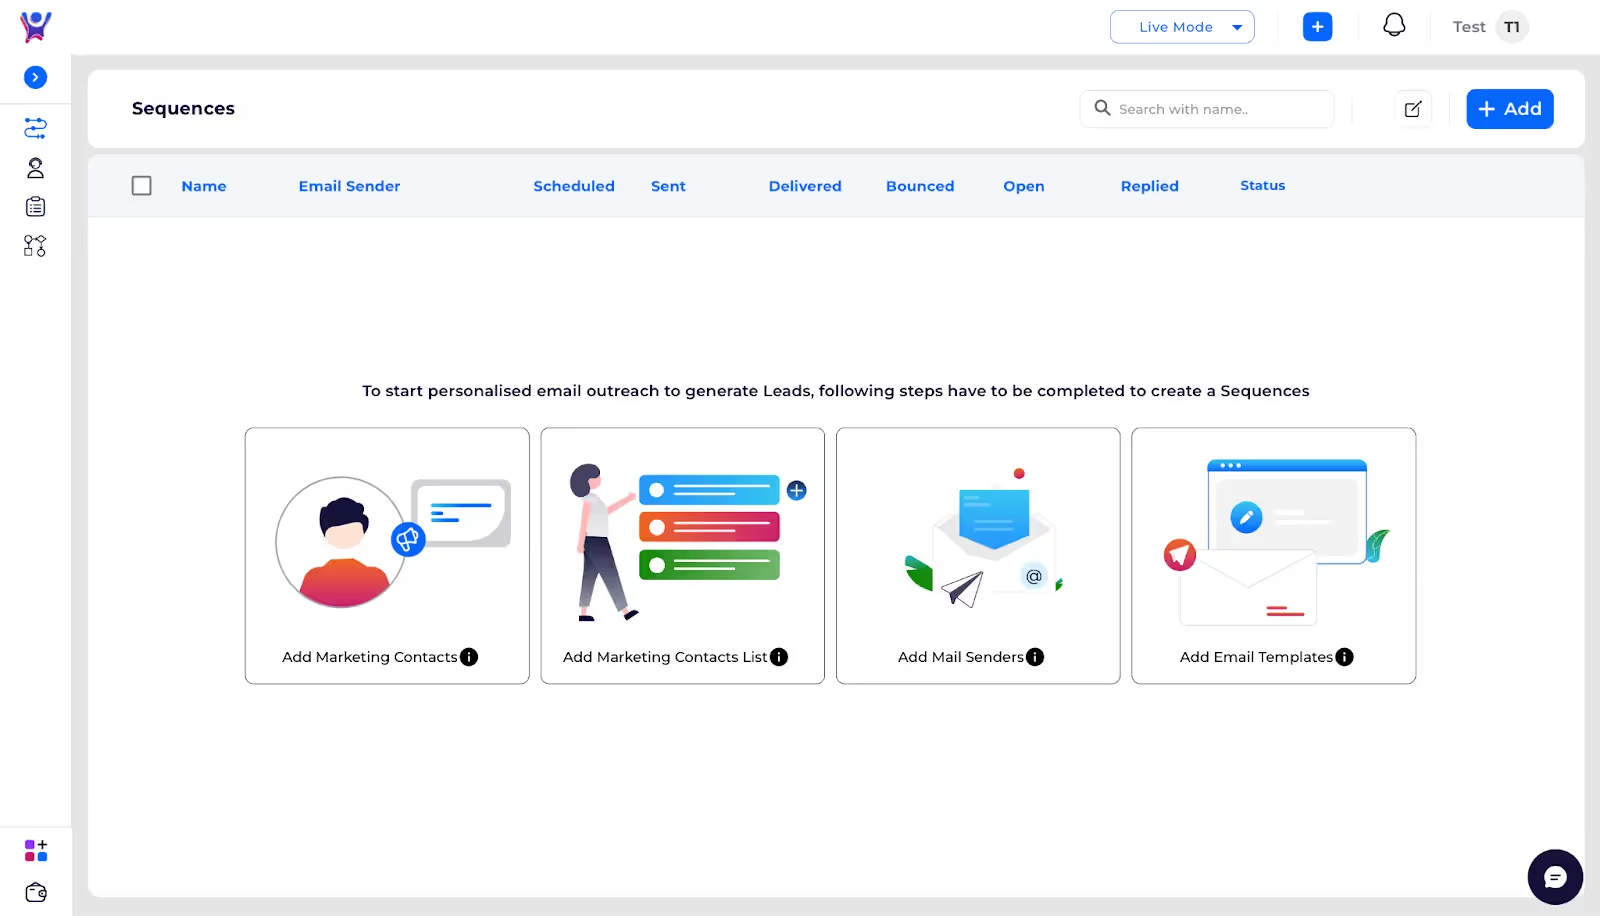
- Description: Before creating a sequence, ensure the following steps are completed: some text
- Create a Marketing List: Add the list of contacts to target.
- Add Templates: Set up email templates to be used in the sequence.
- Configure Email Senders: Ensure the email senders are properly configured and verified.

Step 2: Open the Sequence Creator
- Description: Navigate to the Sequences List Page and click on the Add (+) button to open the Sequence Creator tool.
- Screenshot:

Step 3: Configure Sequence Details
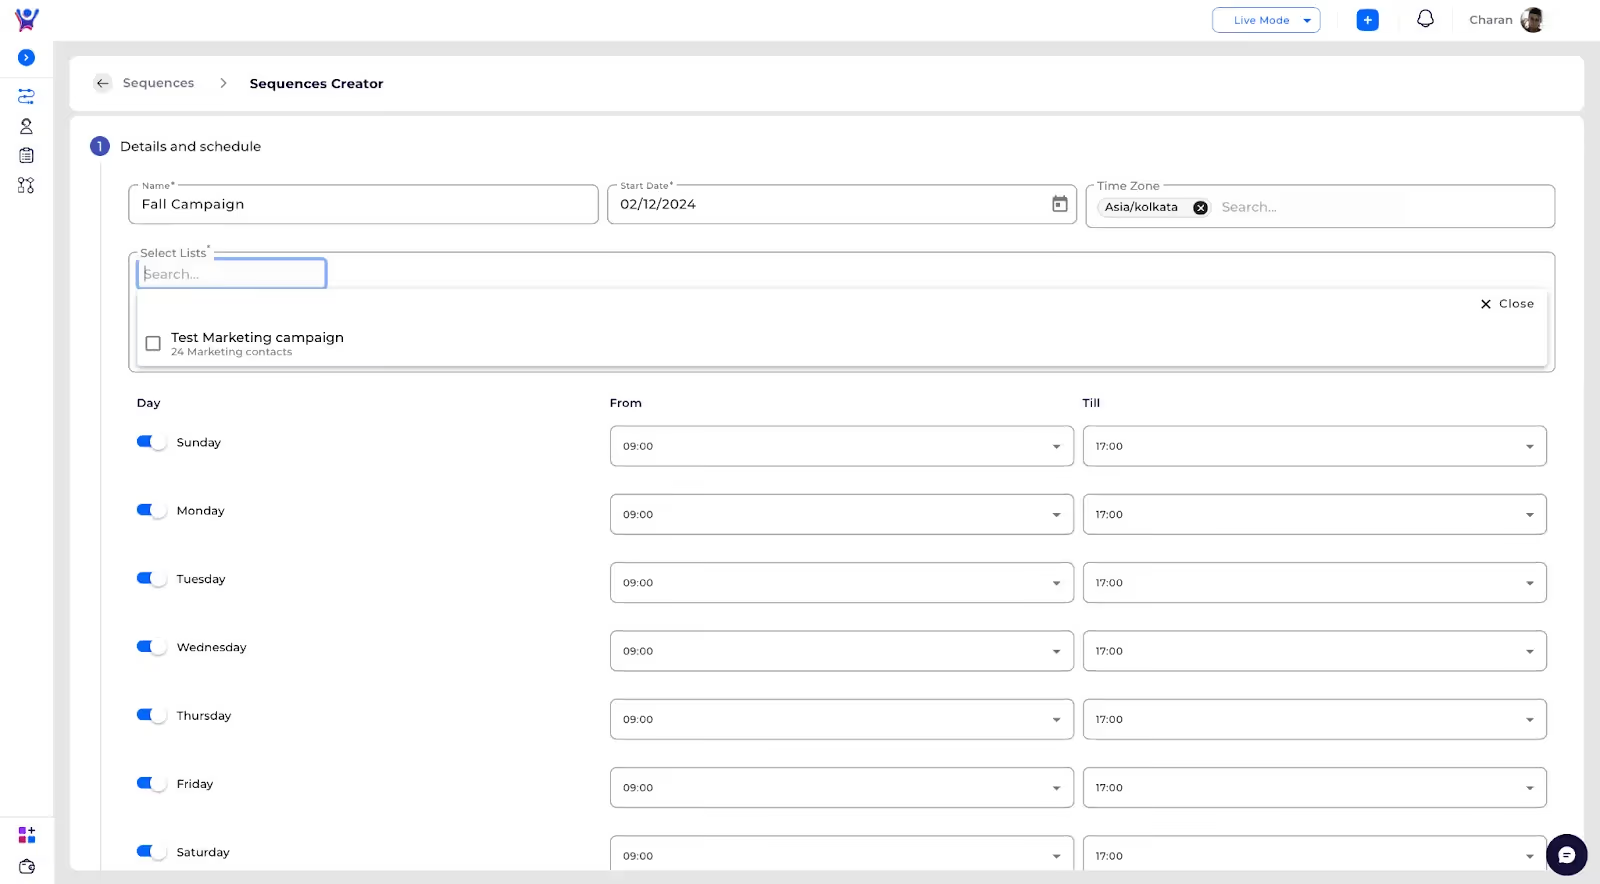
- Name the Sequence: Enter a meaningful name for your sequence in the Name field to easily identify it later.
- Set the Start Date: Select the Start Date for when the sequence should begin sending emails.
- Configure the Schedule: Choose the days and times for the sequence to be active: Use the toggle buttons to enable or disable specific days of the week.Set the From and Till times for email sending within each active day.

Step 4: Create Sequence Steps
- Add the First Step
- Select an email template for the first step in the sequence.

- Optionally, use AI to generate variations of the original template. You can edit and select the AI-generated templates based on your requirements.

- Add Delays and Subsequent Stepssome text
- Insert a delay between the first and second steps. This defines the time gap before the next email is sent.
- Select a new template for the subsequent step.

- Action 3: Use A/B Testingsome text
- In any step, enable A/B Testing to compare the performance of two different templates.
{{screenshot}} (A/B testing setup screen) - Add two templates for the test and track their KPIs (e.g., open rates, click rates) to determine the better-performing version.
{{screenshot}} (KPI comparison for A/B testing)
- In any step, enable A/B Testing to compare the performance of two different templates.
Step 5: Email Senders and Tracking
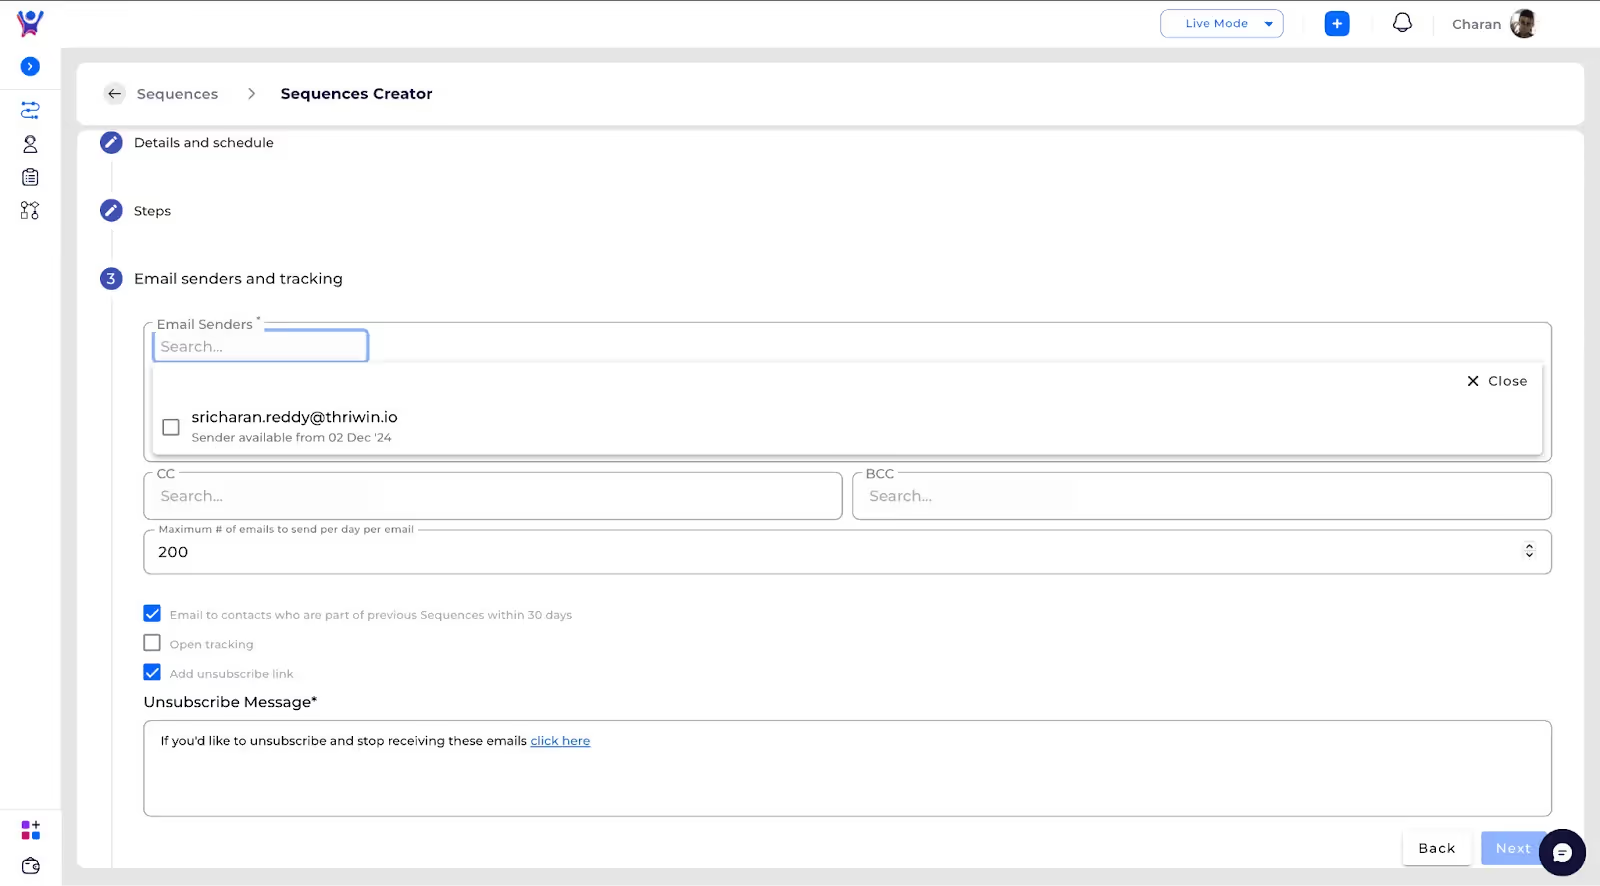
- Description: In this step, you will configure the email sender, set tracking preferences, and customize unsubscribe options for your sequence.
Action 1: Select an Email Sender
- Choose an email sender from the Email Sender's dropdown list.some text
- The availability of the sender is displayed below their name.
- For example, "Sender available from [date]."

(Optional) Add CC and BCC recipients to send copies of the sequence emails to additional addresses.
Action 2: Configure Email Sending Limits
- Specify the Maximum number of emails to be sent per day per email sender.
- For example, enter 200 to cap the daily limit at 200 emails.
- You can see the sender limit of each email in Email Senders List page
Action 3: Enable Tracking and Unsubscribe Options
- Enable Open Tracking to monitor whether recipients open the emails.
- Check Add Unsubscribe Link to include an unsubscribe option in every email.some text
- Customize the Unsubscribe Message to match your communication style. For example:
"If you'd like to unsubscribe and stop receiving these emails, click here."
- Customize the Unsubscribe Message to match your communication style. For example:
- (Optional) Check "Email to contacts who are part of previous sequences within 30 days" if needed.

Action 4: Proceed to the Next Step
Once all configurations are complete, click the Next button to continue to the final step.
Step 6: Email Senders and Tracking
- Description: Review all the details of your sequence in this step:
- Verify the sequence name, schedule, and steps.
- Confirm sender configurations and tracking options.
- Once satisfied, click Submit to activate your sequence.

FAQs
- Question 1: When will my emails be scheduled?
- Answer: Emails will be scheduled on every valid date specified in your sequence.
- Question 2: What happens if I add multiple senders, but only one is available?some text
- Answer: Emails will be sent from the available sender until the next one becomes active.
- Question 3: What if I set the email limit higher than the sender's actual limit?
- Answer: The email limit for each sender will always take precedence, ensuring the platform respects the limits configured for the sender.
Best Practices
- Use Different Senders for Different Sequences:
To avoid overloading a single sender and improve deliverability, assign different senders to different sequences. - Test Templates Before Launch:
Use A/B testing to determine which email template performs best before sending it to the full audience. - Monitor Sender Availability:
Regularly check the availability of email senders to ensure continuous delivery without interruptions. - Keep Unsubscribe Options Transparent:
A clear unsubscribe message improves user trust and reduces the chances of your emails being marked as spam. - Limit Frequency of Emails:
Avoid sending too many emails within a short period to prevent overwhelming your audience.
Need More Help?
- Contact Support: Reach out our Support Team
%201.svg)


.svg)


.svg)