%201.svg)
To navigate to Contacts, follow below steps:
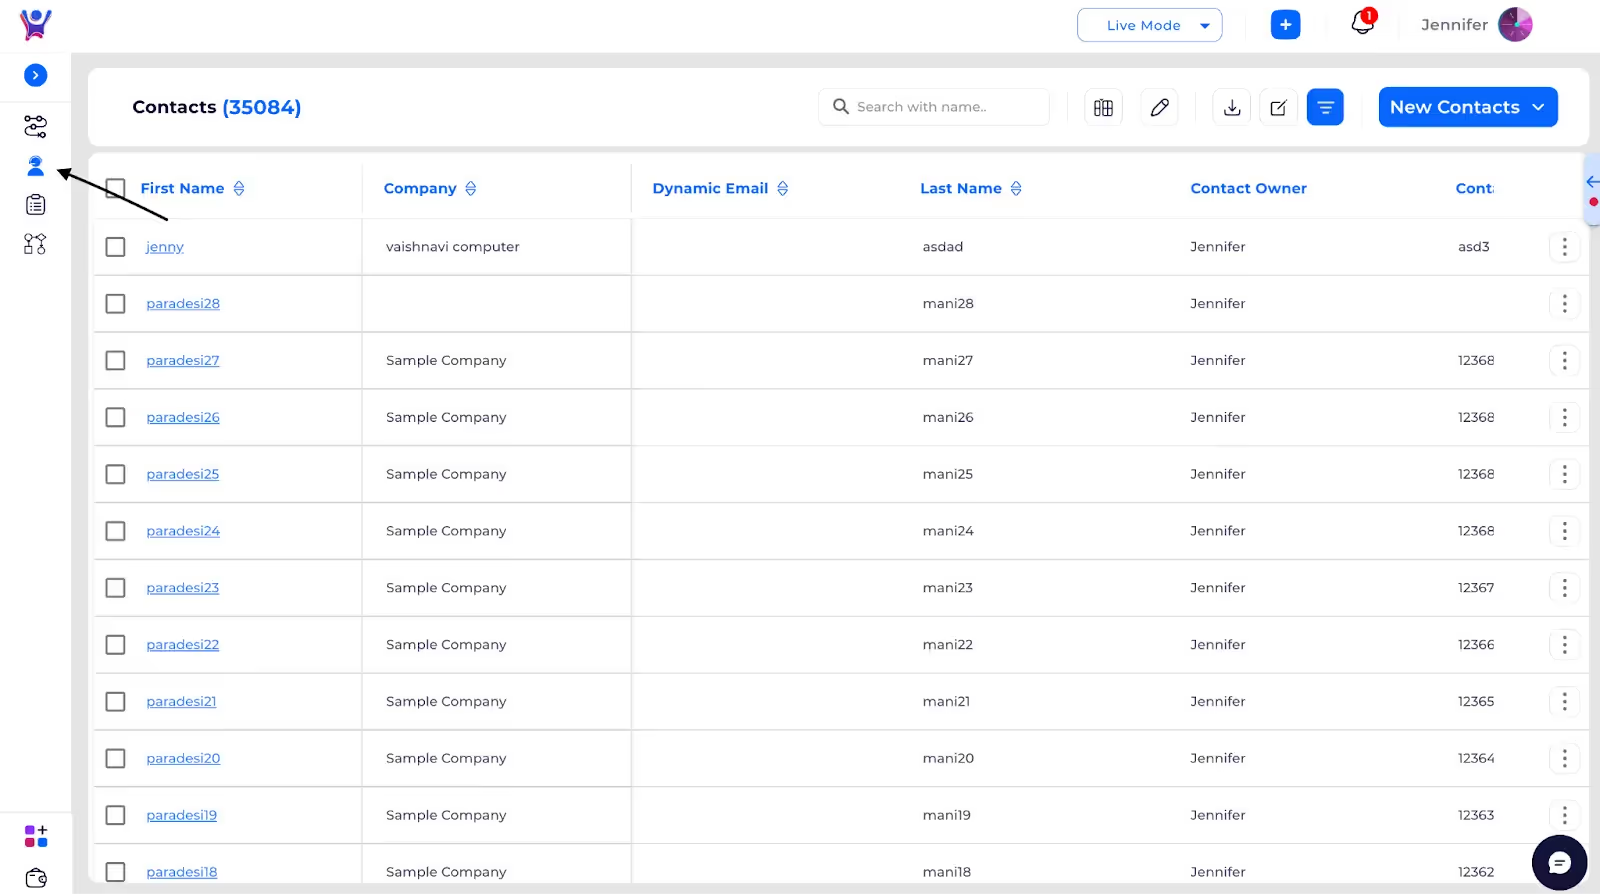
Navigation to Contacts
Step 1: Locate the CRM section: Look for the CRM or Sales module in the navigation menu.

Step 2 : Click on "Contacts": Once inside the CRM section, select the "Contacts" option to view and manage contacts.

Addition of Contact
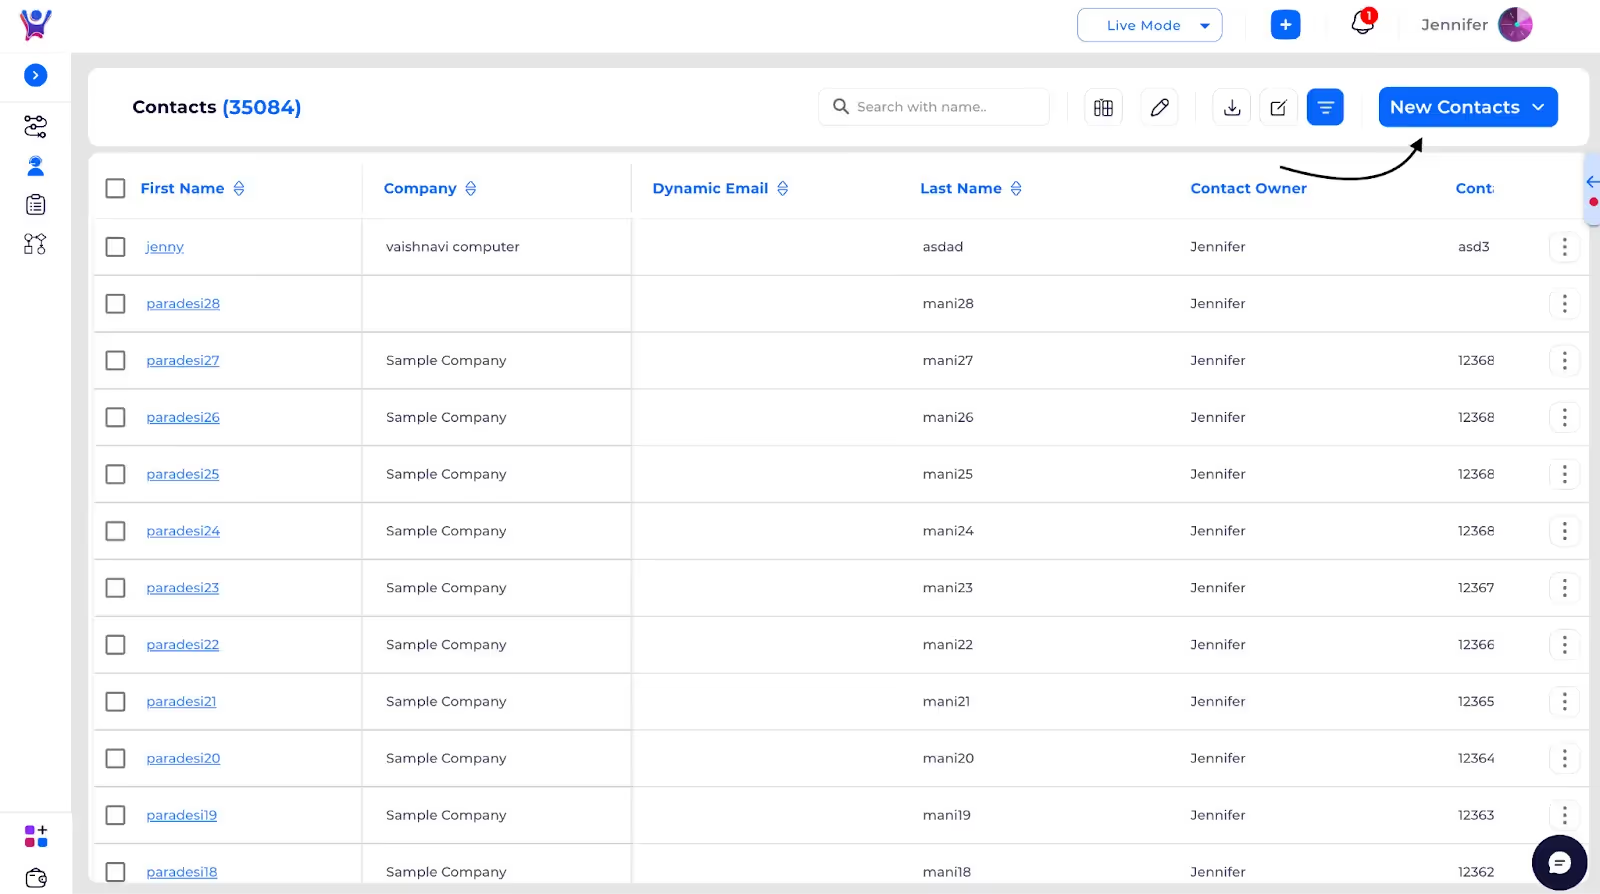
Addition of a single Contact
To add a contact, follow these steps:
- Click the "Add" button: This will open the form to add a new contact.
- Fill in the mandatory data fields: Ensure that all required fields are completed.
- Access optional data fields: Click on "View Optional" to reveal additional fields if needed.
- Submit the contact: Once the information is filled in, you can either:
- Submit: Save the contact and exit.
- Save and Add New: Save the current contact and open a new form to add another contact.
Step 1: Click the "Add" button
Step 2: It opens the initial contact form where you can fill in the mandatory details for the new contact

Step 3: Clicking on the "Optional Fields" link will expand the form to show additional fields
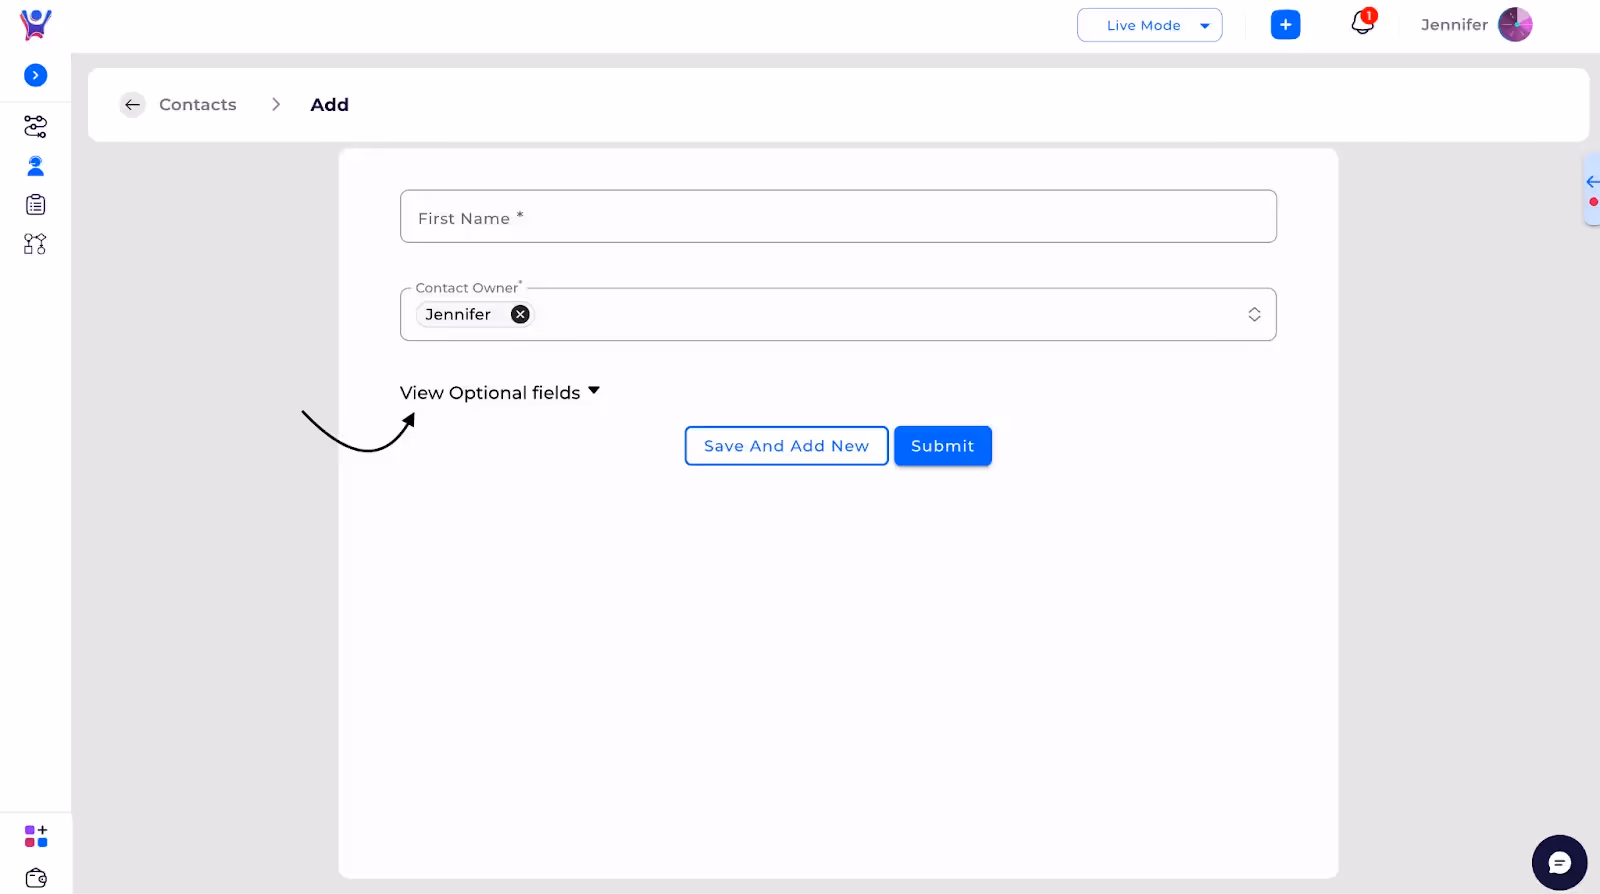
Step 4: Click on Submit: Save the contact.

Step 5: Click on Save and Add New: Save the current contact and open a new form to add another contact

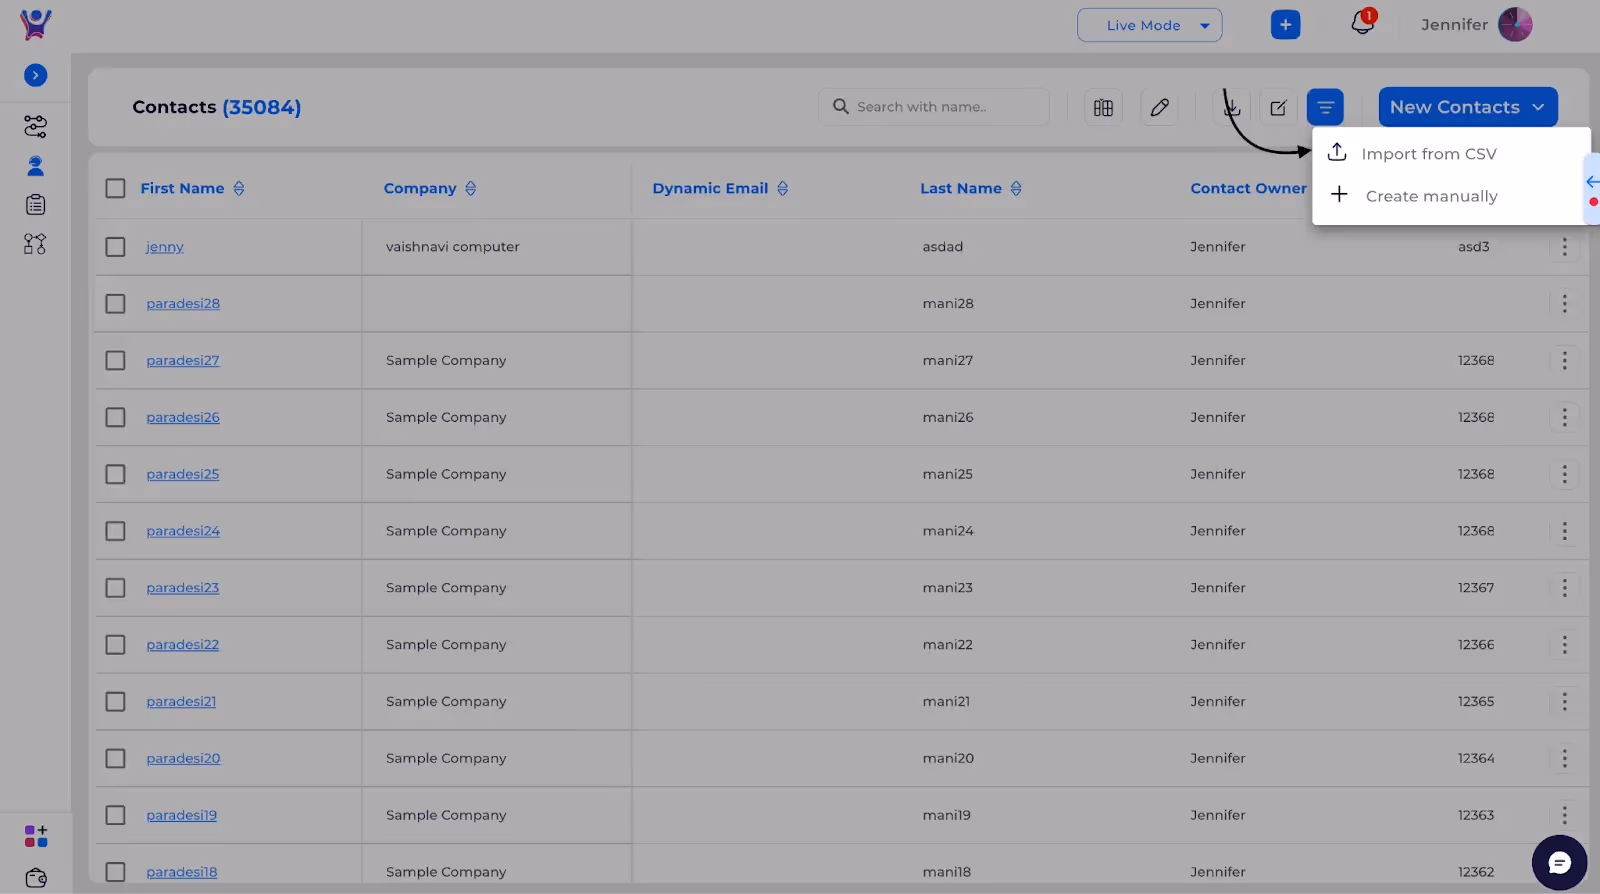
Bulk addition of Contacts through Import
Purpose: To import contacts using Excel or CSV files.Steps:Here are the steps to import contacts:
- Select the "Import" option.
- Choose the "Create" mode to add new contacts.
- Map the columns in your file to the corresponding system fields to ensure proper alignment of the data.
- Click "Submit" to initiate the import process.
- Wait for the acknowledgment email, as the import is processed in the background and may take some time.
- Check the email for error messages. If any rows contain errors, they will be highlighted in orange, and the email will provide specific error details for correction.
Step 1: Select the "Import" option.
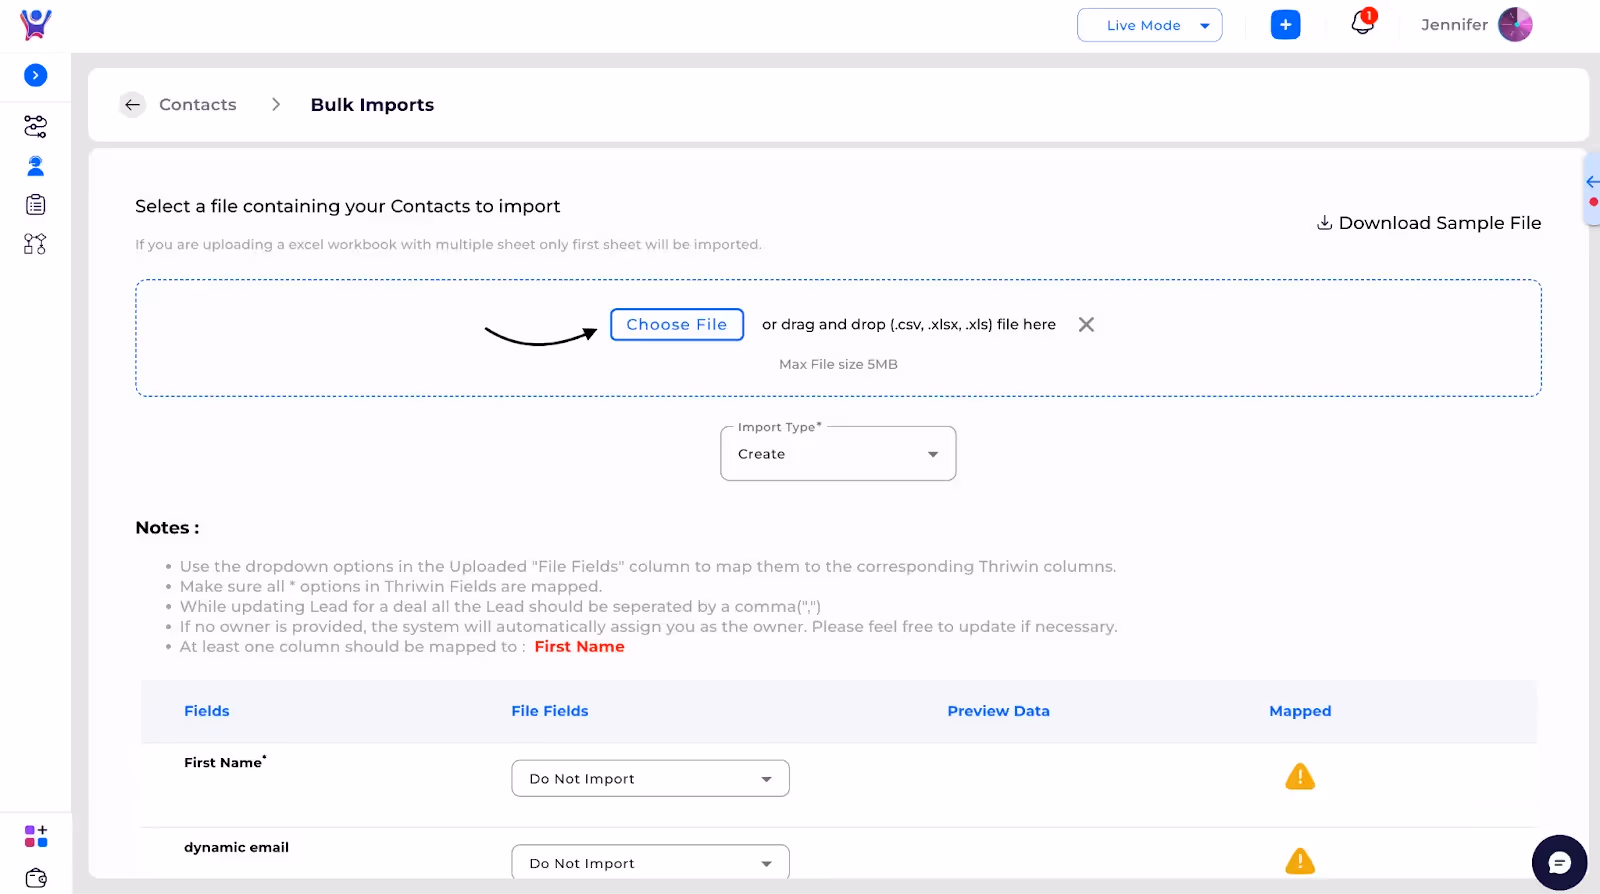
Step 2: Click on the "Choose File" button to open the file selection window. From there, select the desired Excel or CSV file from your device and click "Open"
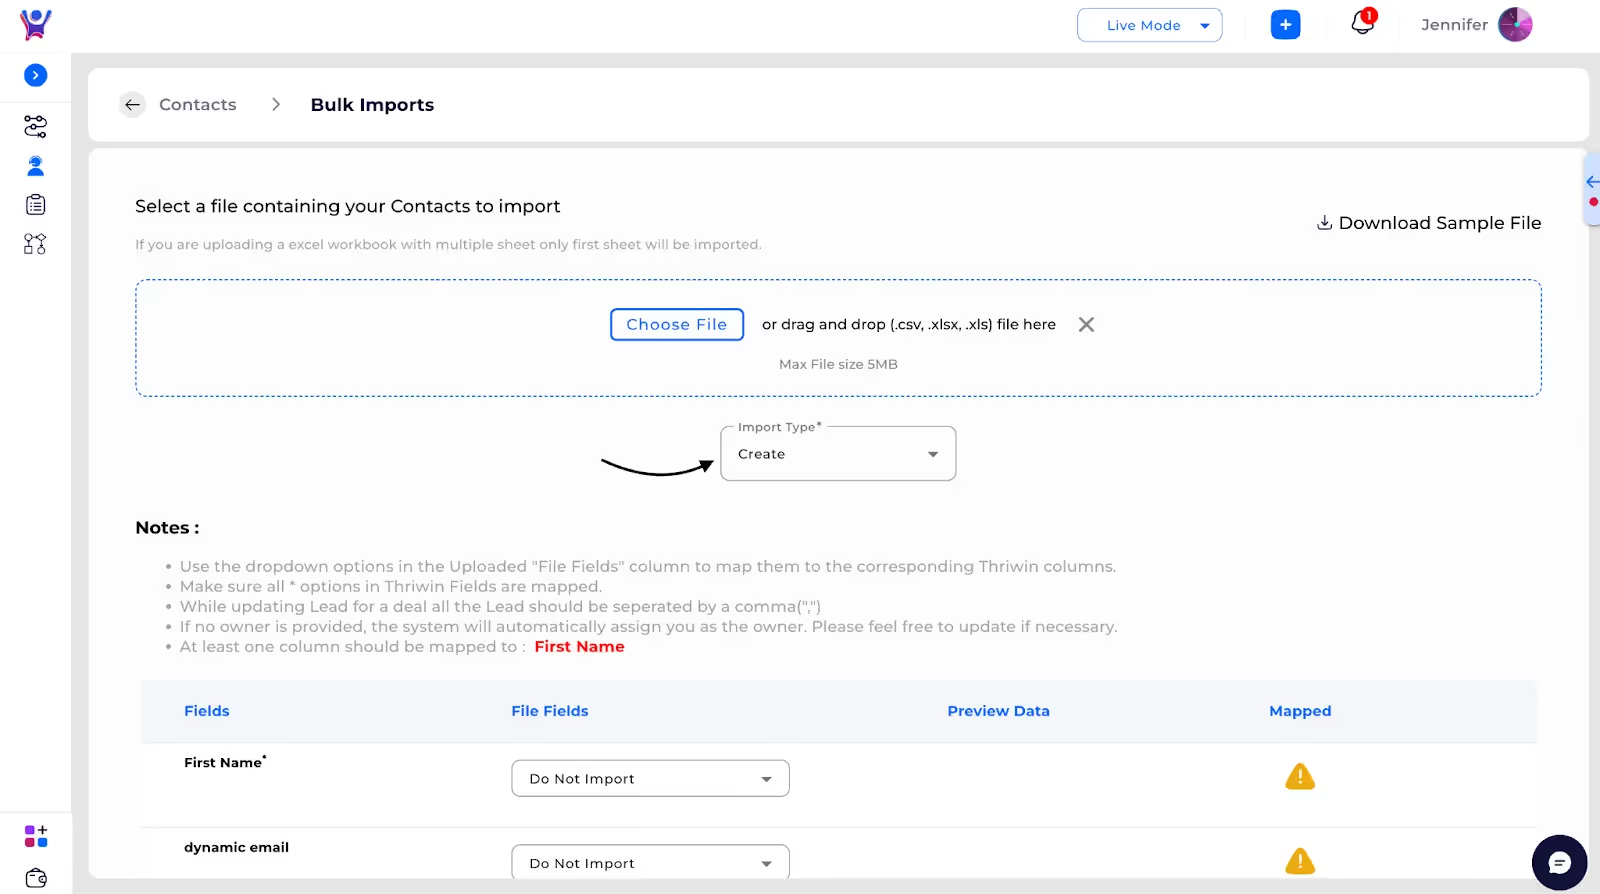
Step 3: Choose the "Create" mode to add new contacts
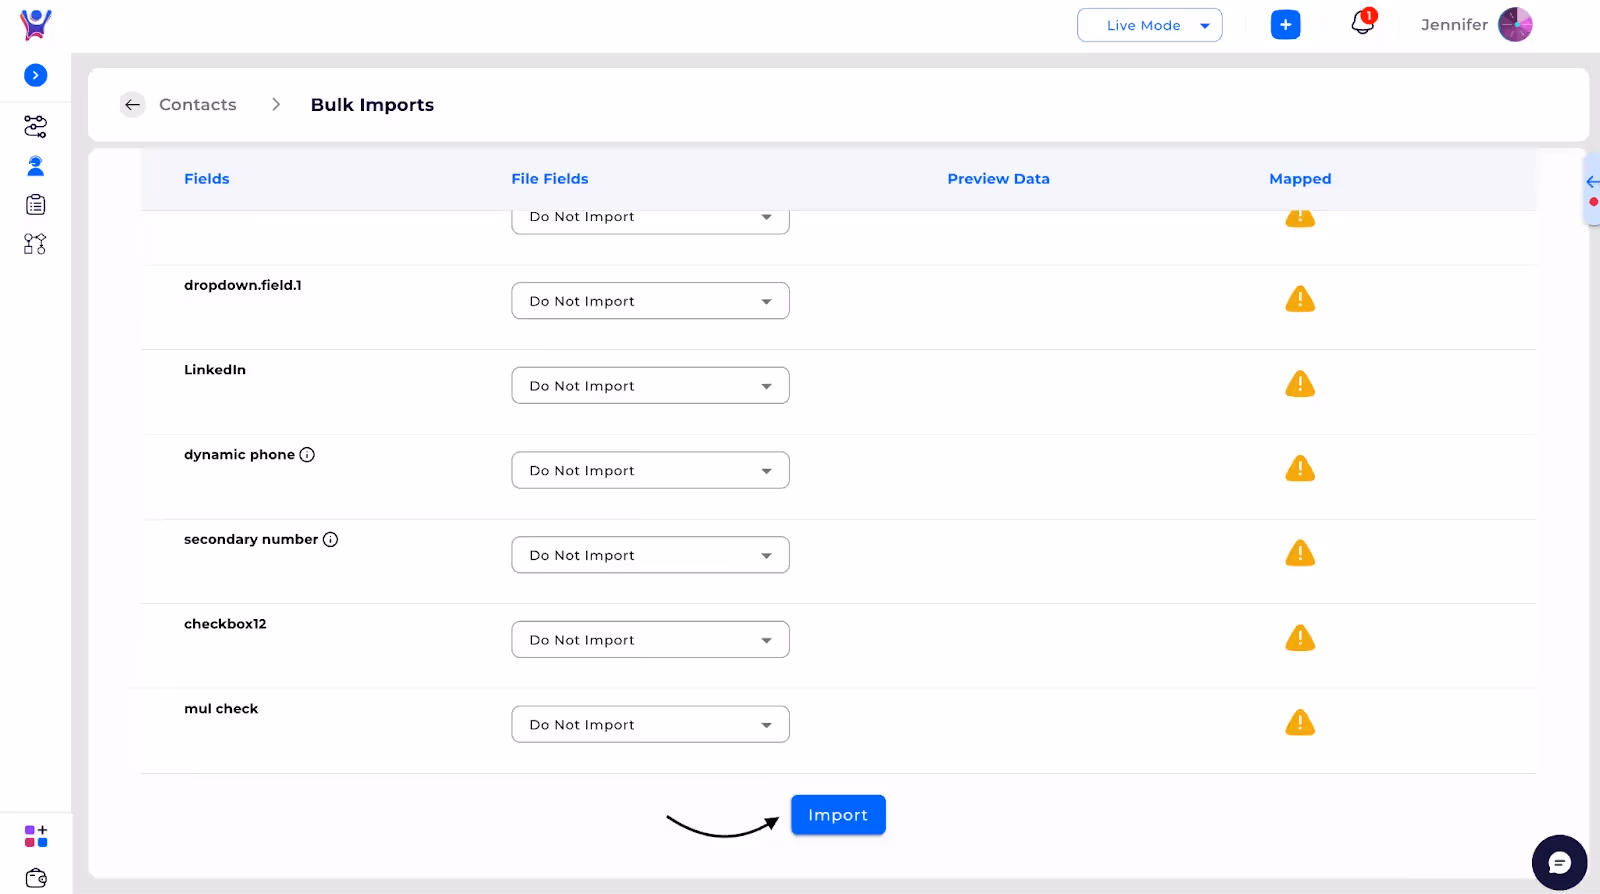
Step 4: Map the columns in your file to the corresponding system fields to ensure proper alignment of the data.

Step 5: Click "Import" to initiate the import process.


.svg)


.svg)