%201.svg)
Form Fields Customization
Scope: creation of new fields or update the form configuration of existing fields with various data types.
Here’s an explanation of each data type:
- Text Field: A single-line field used to enter short text, such as names or titles.
- Text Area: A multi-line field for longer text input, such as descriptions or comments.
- Number: A field that only accepts numeric values, used for entering quantities, prices, or any numeric data.
- Phone Number: A field designed specifically for phone numbers, typically formatted to handle country codes, area codes, and digits.
- Date: A field that allows users to select a date from a calendar or manually enter a date.
- Radio: A group of mutually exclusive options where the user can select only one value from the list.
- Checkbox: A field that allows users to select one or more options from a list of choices.
- Toggle: A binary field that can be switched between two states, such as “On” or “Off.”
- Range Slider: A slider that allows users to select a value within a specified range, useful for inputs like price ranges or ratings.
- Email: A field specifically for email addresses, with validation to ensure the input matches the format of an email.
- File: A field that allows users to upload files, such as documents, images, or other media.
- Dropdown: A field where users can select one option from a predefined list, presented as a dropdown menu.
Preview and Save Configuration
- Preview Form: You can preview the form to see how it will appear after applying the changes.
- Save Configuration: Once you’ve created or edited the field configurations, use the respective actions to save your changes, ensuring the updates are applied to the form.
- You can change the order of the fields on the form by adjusting their sequence to suit your preferences.
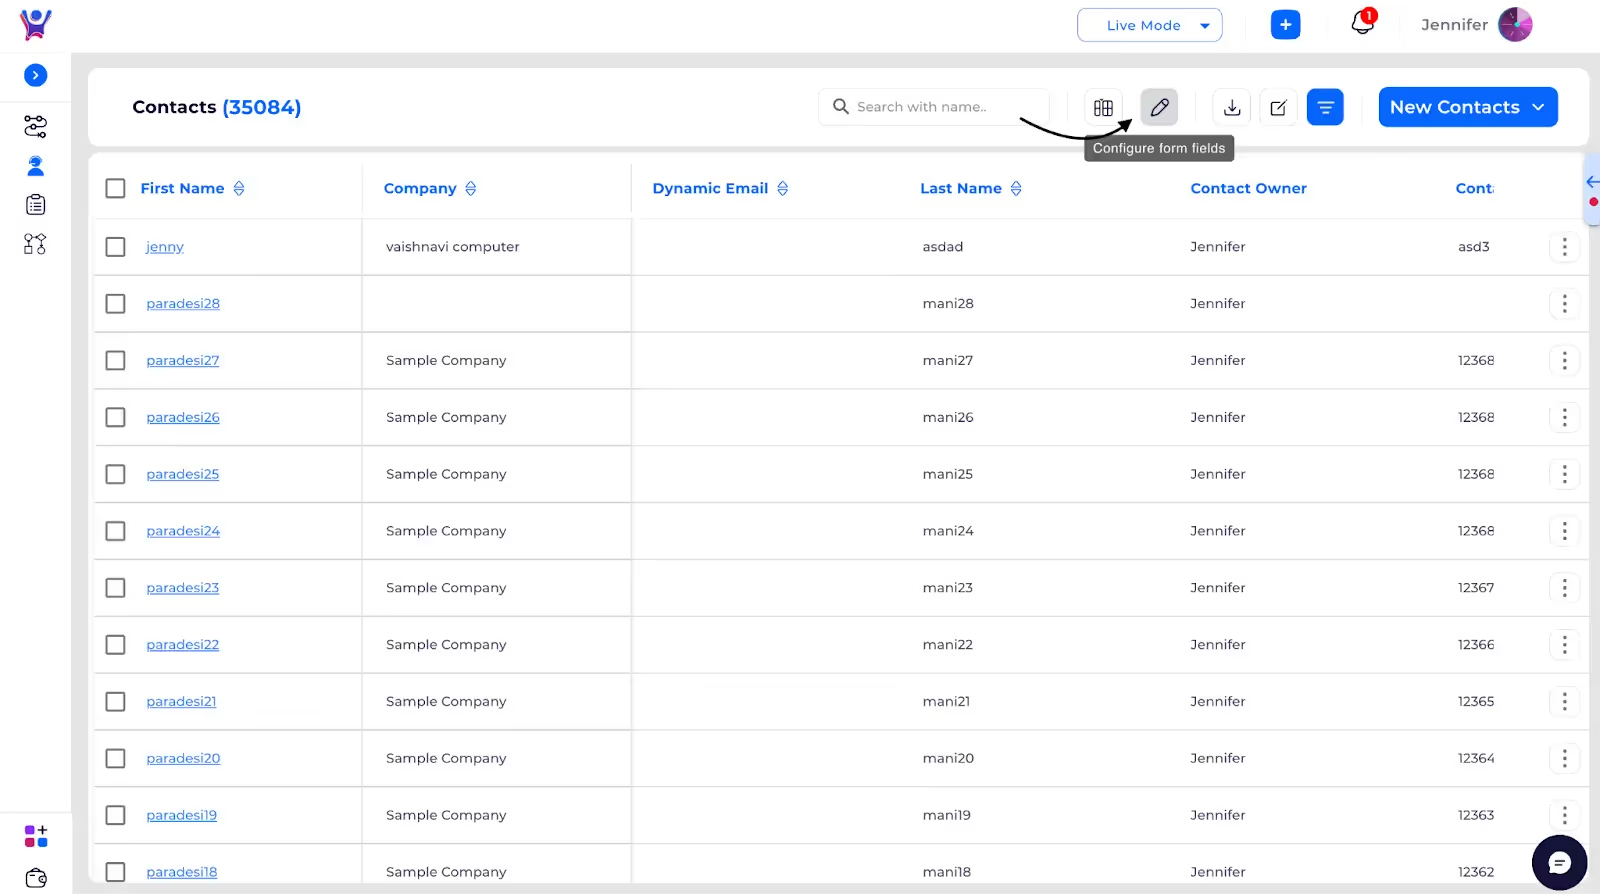
Step 1: Click on Form field
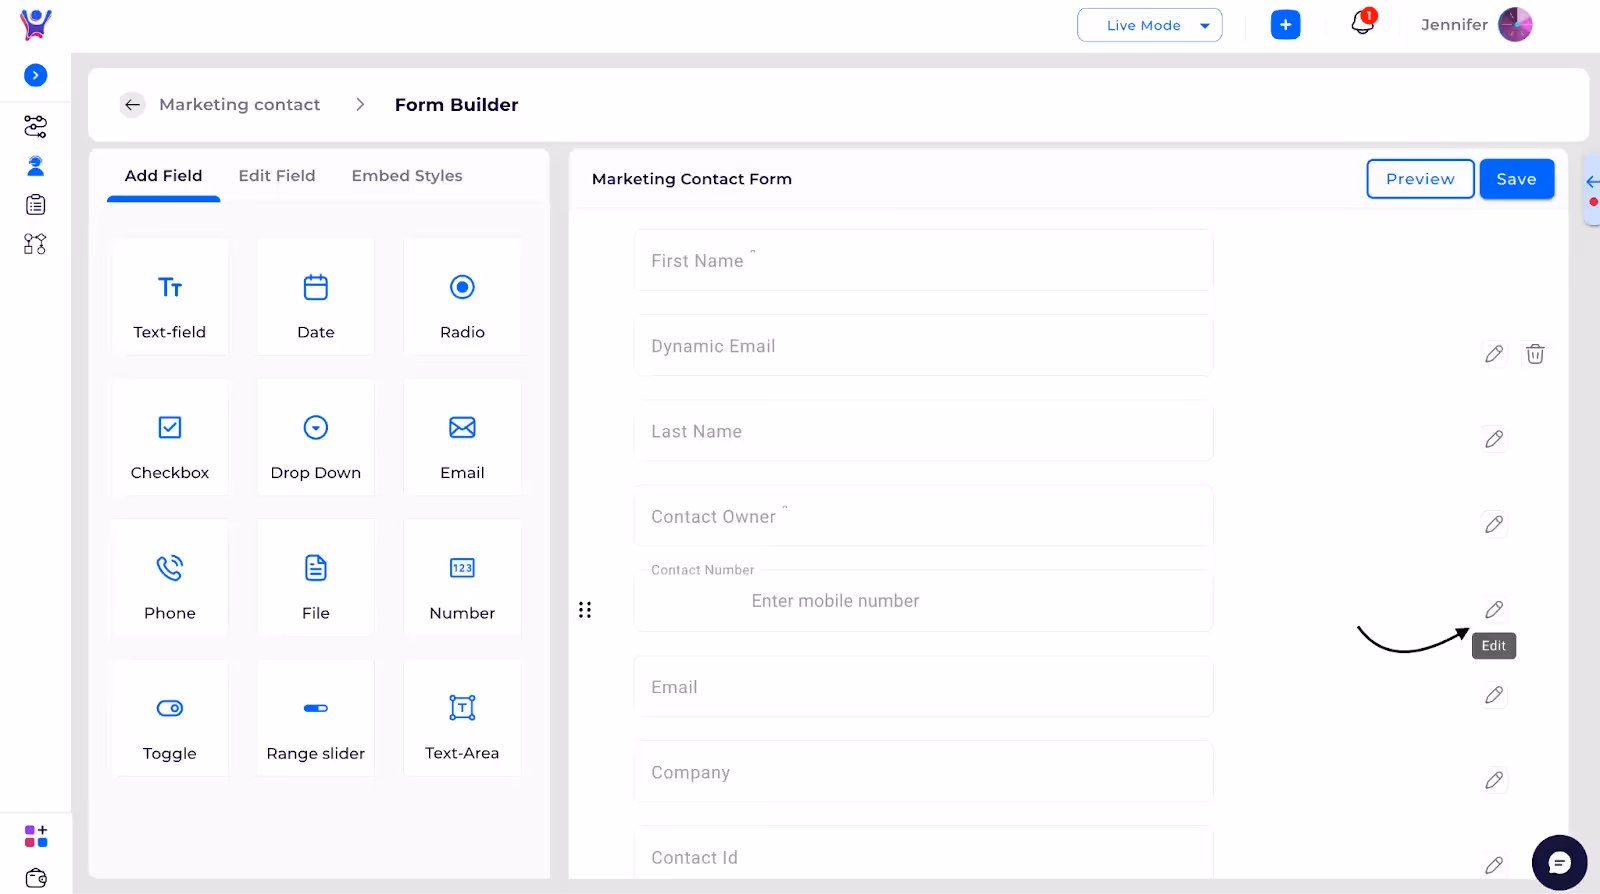
Step 2: Click on Edit icon to edit field
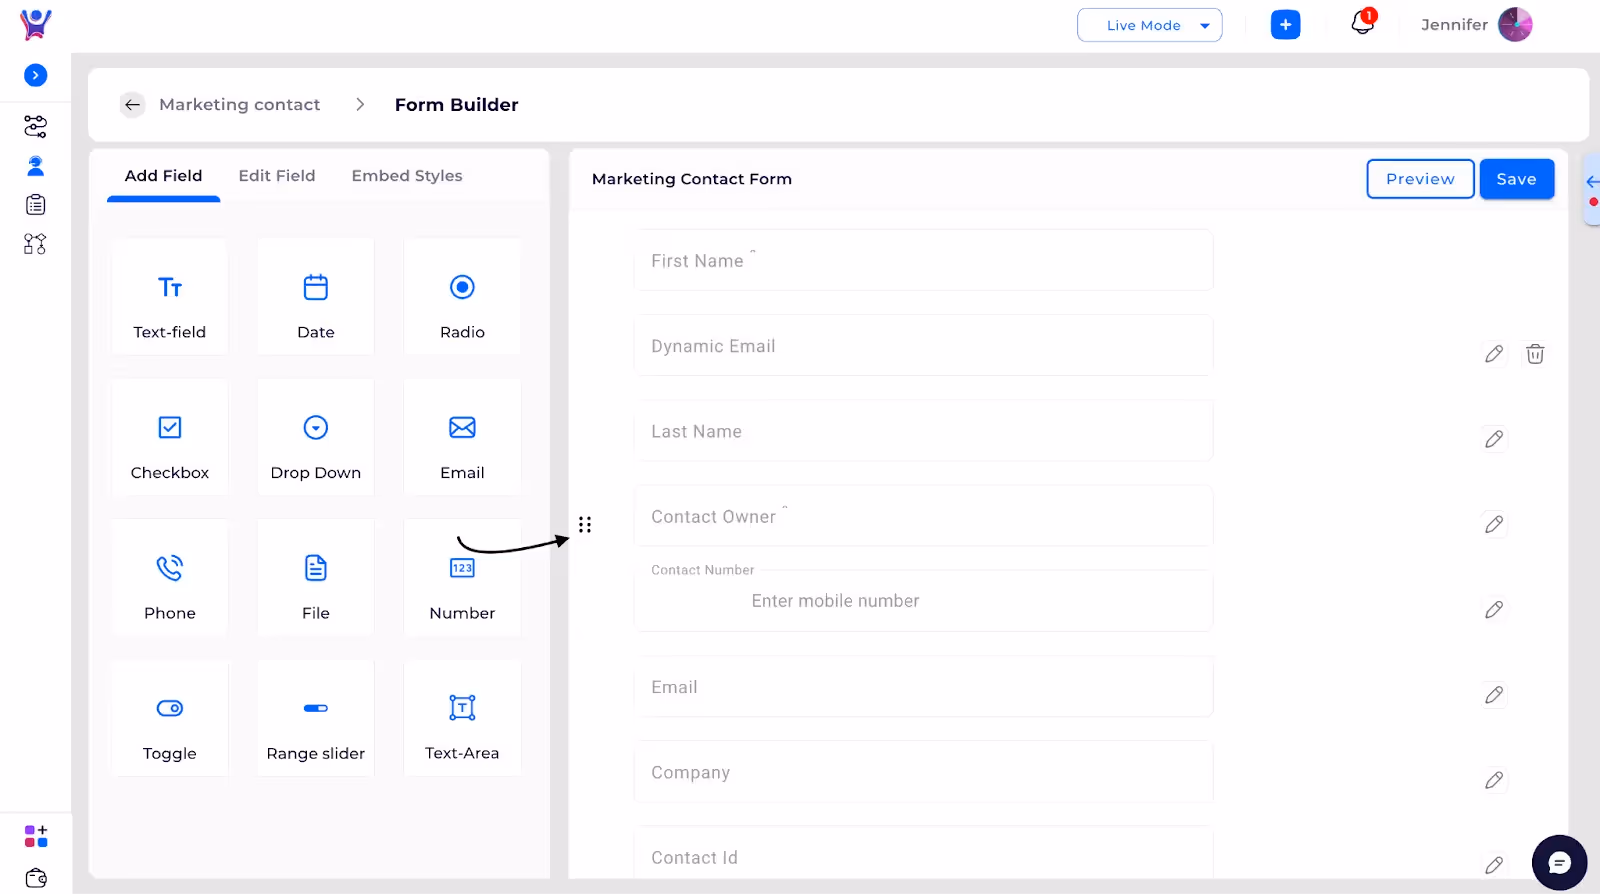
Step 3: Drag and change the sequence of the order of fields
Step 4: Click on delete icon to delete form field

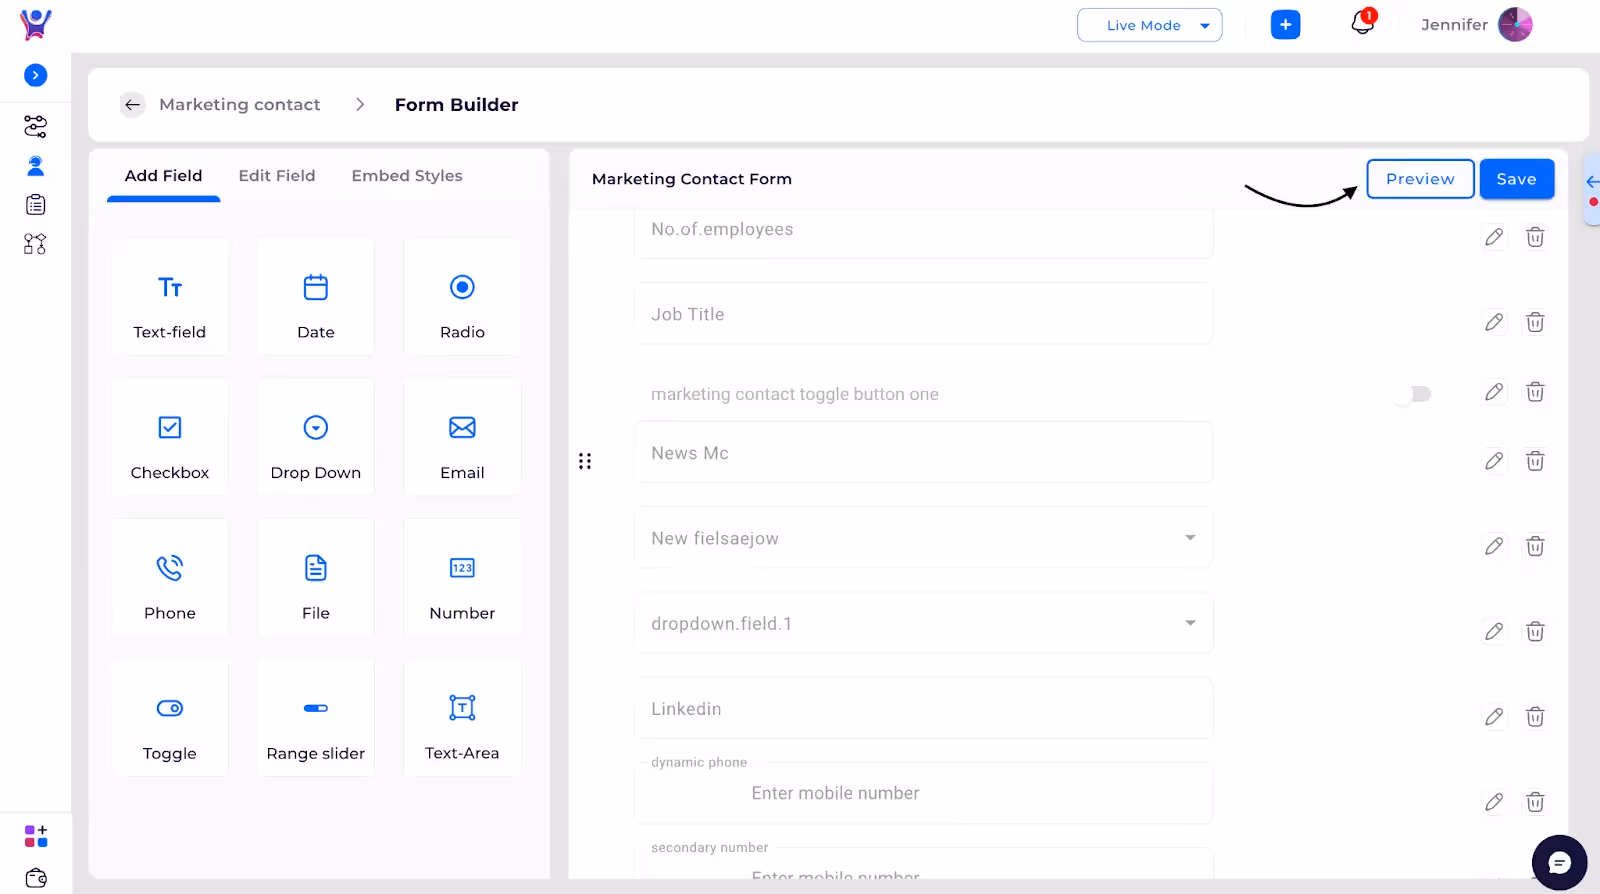
Step 5: Click on preview to preview the form
Step 6: Click any one of the icon under add field to create respective field For example:
Step 7: After making essential changes, click on save
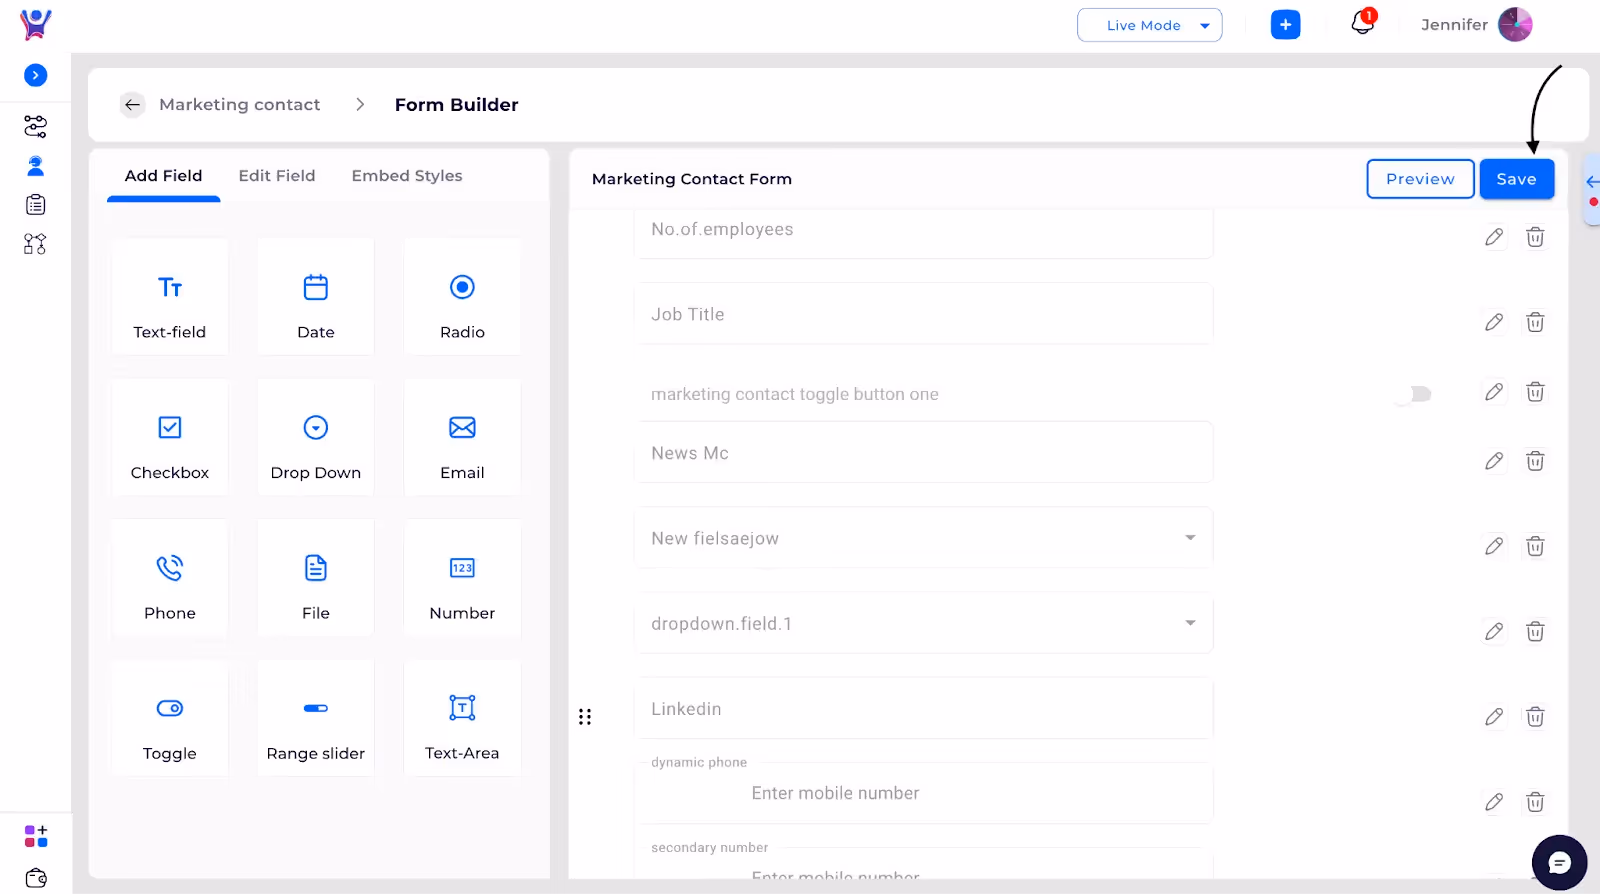


.svg)


.svg)